
P
eanut brittle is hands down my favorite homemade Christmas candy. It was never my favorite as a child, it seemed to taste like burnt baking soda. As I got older and learned to make my own, altering the recipe one ingredient at a time, it soon became my absolute favorite holiday treat.
The key to peanut brittle is a little corn syrup to prevent crystallization and a whole lot of butter to enhance the peanut flavor. This recipe is packed with a full cup of butter. This is not common in peanut brittle recipes, but certainly gets credit for the caramel shards of peanut packed goodness! Now, I still add baking soda to create all of the signature air bubbles, just not enough to flavor the brittle.
Try this recipe and you will quickly see why it makes the perfect neighbor gift. This salty-sweet confection packages perfectly and lasts longer than baked goods. With simple ingredients and classic flavors, it is easy to see why peanut brittle has lasted the test of time and is still a holiday favorite!
Ingredients:
2 cups granulated sugar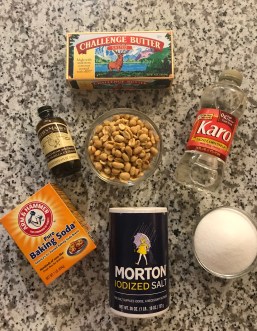
1 cup light corn syrup
1/2 cup water
1 cup butter
2 1/2 cups roasted salted peanuts
1 teaspoon soda
1 teaspoon vanilla extract
Instructions:
- Line two cookie sheets with parchment paper and set aside.
- Combine sugar, corn syrup, and water in a heavy saucepan.
- Stir over medium heat until sugar is dissolved and mixture comes to a boil.
- Add butter and stir until mixture reaches a boil.
- When the mixture begins to boil, cook for 12 minutes then add peanuts.
- Continue to cook stirring constantly until candy reaches the hard crack stage (305°F).
- Remove from heat and quickly add soda and vanilla.
- Stir until well combined. Candy will become very foamy.
- Pour hot candy onto two parchment-lined cookie sheets.
- As the candy cools, use two forks to thin by lifting and pulling the candy.
- Let candy completely cool then break into pieces.
Tips:
- INFRARED THERMOMETER!!! Get a laser digital thermometer and your candy making ability will improve 100%. Candy thermometers are so incredibly finicky and there are a million variables that can cause a misread on the temperature. For under $20.00 you can take the guesswork out of candy making. I do not sell thermometers nor do I endorse a brand…I just want you to love candy making as much as I do. This will be the single most important purchase that will make your candy making life easier.
- Be sure to check the accuracy of your candy thermometer by boiling water before using it. If boiling water reads above or below 212°F add or subtract the same degrees in the recipe to allow for the difference. Even weather can alter the boiling point. As the barometric pressure goes up or down so does the boiling point. Be sure to calibrate the recipe accordingly.
- When you get the proper reading, do a good old fashioned string test in a cup of cold water…this will let you know the crack and texture are correct.
- I have modified my candy recipes to include light corn syrup. Corn syrup is an invert sugar and will prevent sugar crystallization and grainy candy…you’re welcome 🙂
- Remember to keep the heat steady on medium and stir slowly. Candy making cannot be rushed by higher heat or rapid stirring. As much as we all hated chemistry class, candy making is a science. From tempering chocolate to hard crack candies and everything in between it is all about the sugar crystals. So turn on some Christmas music, take your time and enjoy the process (ask any of my kids…the music is really my secret).
- The vanilla used in this recipe is crucial to the flavor. I use Nielsen Massey in this recipe as it accents the peanuts perfectly.
- It is very important to use fresh baking soda in order to get the candy light and airy. Baking soda should last 6 months opened. I prefer to use peanut brittle making, the time I rotate my baking soda, ensuring the proper chemical reaction.
- Have all of your ingredients on the counter and measured. Once the candy is to temperature it moves quickly and you do not want to overcook.


My brittle turned out great! I did add 1/2 tsp. Of butter extract with the vanilla and it’s so delicious!! Happy Holidays!
LikeLike